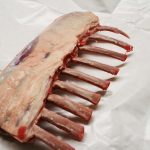
Rack of lamb is most often sold in grocery stores as frozen New Zealand or Australian lamb, and that’s usually my preference. Lamb from these regions is typically spring lamb, naturally tender, mild, and consistently flavorful. You can absolutely buy locally sourced lamb as well but aim for the smallest rack you can find. Younger lamb means more tenderness and a cleaner flavor.
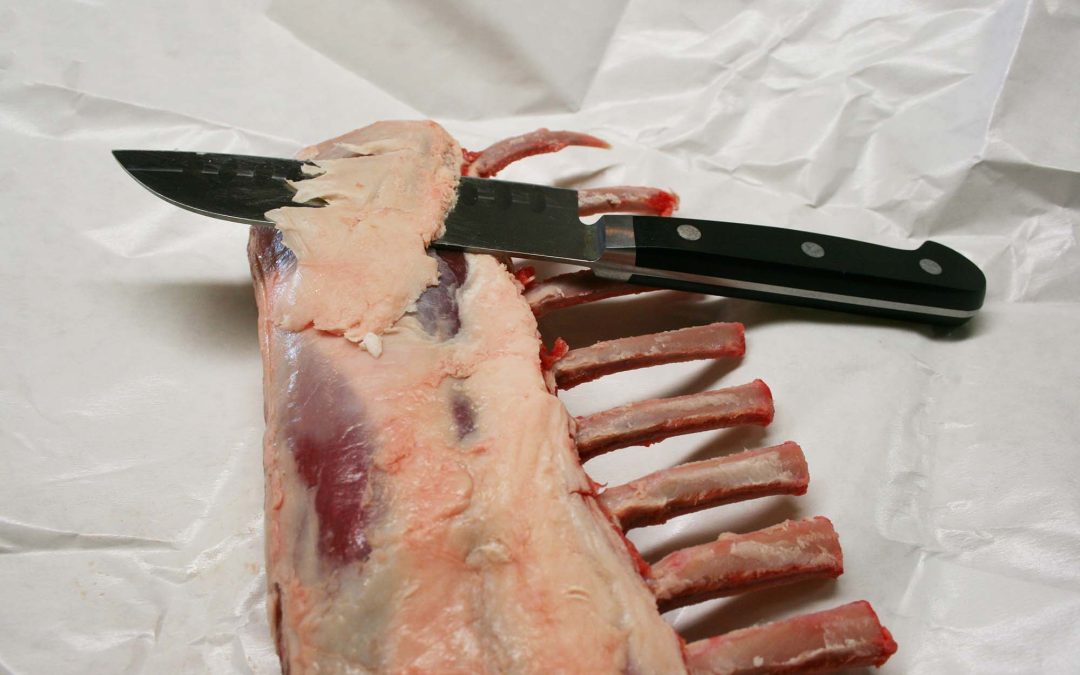
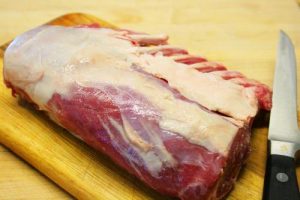
Whether you choose local or imported, the price is usually comparable, and most racks come “frenched,” meaning the bones are already cleaned and exposed so you can slice between them easily. What they don’t come with is a trimmed fat cap. Almost all racks arrive with a thick layer of fat still attached, and I always take a few minutes to trim it down. Removing the excess fat and the meat between the bones not only improves the eating experience, it also creates a much more elegant presentation.
Below, I walk you through exactly how I trim my racks of lamb. It’s a simple process, and once you’ve done it once, you’ll never go back. A little prep makes all the difference in both flavor and appearance.
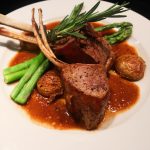
Pan Seared Rack Of Lamb
Ingredients
- 1 rack New Zealand or Australian rack of lamb
- kosher salt and freshly ground black pepper
- drizzle of olive oil
Instructions
- Gather all ingredients before starting recipe.
- Trim the cap off the rack.
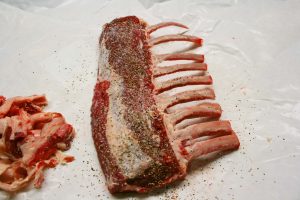
- The racks come 'Frenched' so just remove any remaining bits between the bones after removing the cap and season well with kosher salt and freshly ground black pepper. Add a drizzle of olive oil and allow to rest for an hour before cooking.
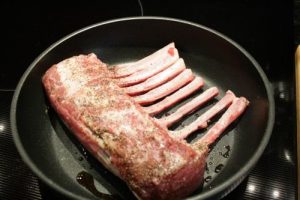
- Heat a small oven proof frying pan over high heat for 1-2 minutes, then add the rack, skin side down. Sear for 3 minutes.
- Turn the rack skin side up and sear for 3 minutes, and then place the pan in a 400°F oven for 10-12 minutes
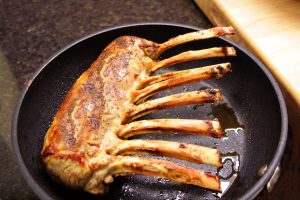
- Remove from oven and place rack on a cutting board and allow it to rest for 5-10 minutes before slicing.
- Slice and serve.